3DModel
This tutorial will guide you step by step to replace or add the player models to the MFPS player prefabs, what you need is:
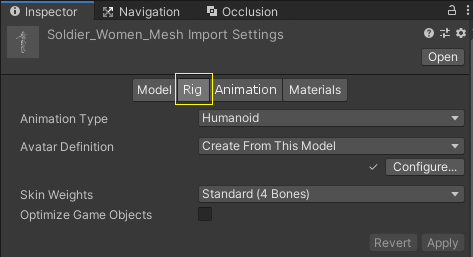
The Model Import Rig setting has to be set as Humanoid in order to work with retargeting animations, for it select the player model (the model not a prefab) and in the inspector window you will see a toolbar, go to the Rig tab and set the Animation Type as Humanoid, the settings should look like this:
Ragdolled - Step 1
All right, with the model ready it's time to start setting it up.
The first thing that you need to do is make a ragdoll of your new player model. Normally in Unity, you make a ragdoll manually with GameObject ➔ 3D Object ➔ Ragdoll, and then assign every player bone in the wizard window manually, but this tool will make this automatically, you simply need to drag the player model below.
Drag here your player model from the Project View
This element is dynamic in the original editor documentation and does not work or render correctly in the static HTML version. It's shown here for reference only — please refer to the built-in editor documentation for full functionality of the doc.
Ragdolled - Step 2
This element is dynamic in the original editor documentation and does not work or render correctly in the static HTML version. It's shown here for reference only — please refer to the built-in editor documentation for full functionality of the doc.
Ragdolled - Step 3
Right now your player model (in the scene) should look similar to this:

Now, these Box and Capsule Colliders are the player HitBoxes (the colliders that detect when a bullet hit the player), in some models these colliders may not be place/oriented in the right axes causing a problem which will be that some parts of the player will not be hitteable in game.
It's crucial to ensure that these colliders envelop the player model accurately. You might need to adjust their parameters or orientation, especially for the head's Sphere Collider. Often, it doesn't fit properly by default, so manual adjustments to its radius might be necessary.
Once everything appears correctly set up, you're prepared to move on to the next step.
Player Prefab - Step 1
Okay, now that we have the player model ragdoll, we can integrate it to a player prefab, for this we would need to open one of the existing player prefabs.
Below you will have a list of all your available player prefabs in your project, click on the one that you want to use as reference to replace it's model.
This element is dynamic in the original editor documentation and does not work or render correctly in the static HTML version. It's shown here for reference only — please refer to the built-in editor documentation for full functionality of the doc.
Player Prefab - Step 2
This element is dynamic in the original editor documentation and does not work or render correctly in the static HTML version. It's shown here for reference only — please refer to the built-in editor documentation for full functionality of the doc.
Player Prefab - Step 3
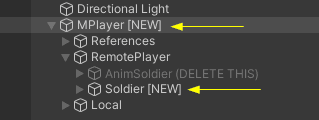
If all works as expected, you should see just a log in the console: Player model integrated.
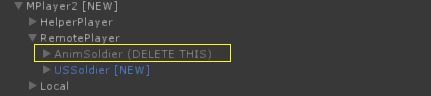
If it's so, you also should see inside the player prefab instanced in the scene hierarchy: MPlayer -> RemotePlayer -> both models the old one (marked with (DELETE THIS) at the end of the name) and the new one.
Next up, there's an essential manual adjustment you'll need to make. When we moved the TPWeapons from the old player model to the new one, the unique local axis orientations of each model might cause misalignment. The weapons could end up not sitting correctly in the new player's hands. To address this, you'll have to manually reposition and reorient the weapons. A good starting point is to adjust the TPWeapon Root, which is the central transform where all the TPWeapons are grouped. You'll identify this as the object named RemoteWeapons in the hierarchy window.
In order to repositioned/re-oriented them, select the RemoteWeapons object which is inside of the player prefab (inside of the right hand of the player model), or click in the button below to try to ping it automatically on the hierarchy window.
After you have fine-tuned the position and orientation, continue with the next step
Player Prefab - Step 4
ADJUST AIM POSITION
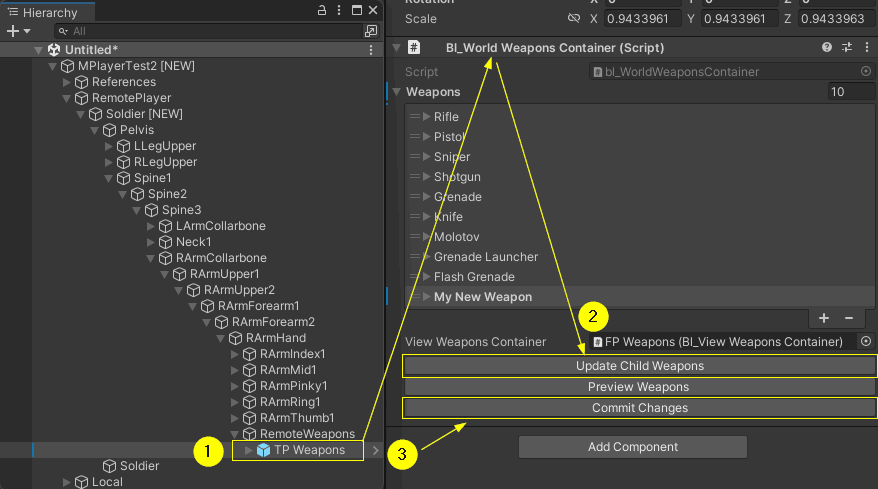
The arms aim position is controlled by IK and the arms aim position can be customized from the inspector, for it select the player model inside the player prefab the one marked with (NEW) inside the RemotePlayer object ➔ then go to the inspector window ➔ bl_PlayerIK ➔ at the bottom of the script inspector ➔ click on the button Preview Aim Position ➔ move the auto-selected pivot and you will see how the arms move with it ➔ positioned the pivot in the place that you want to be the Aim position ➔ once you got it, click on the DONE yellow button and that's.
Now select the TP Weapons object in the hierarchy window > (inspector window) bl_WorldWeaponsContainer > click in the Update Child Weapons button > and then click in the Commit Changes button (click yes in the dialog).
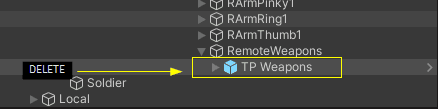
When you are done, make sure that if you haven't deleted the old model yet, you should do it now:
Also, delete the TP Weapons containers from the player prefab since it doesn't have to be included in the prefab.
Player Prefab - Step 5
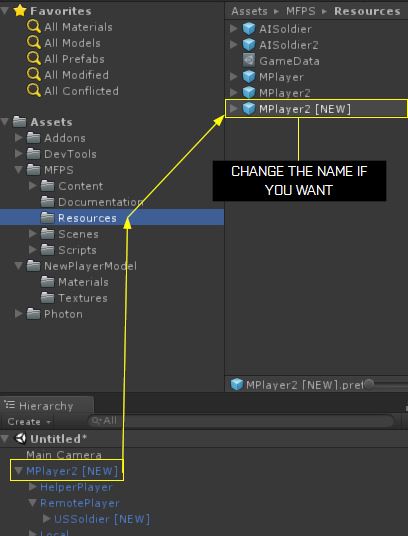
Now you need to copy this prefab inside the Resources folder, by dragging it to: MFPS -> Resources. Rename it if you wish.
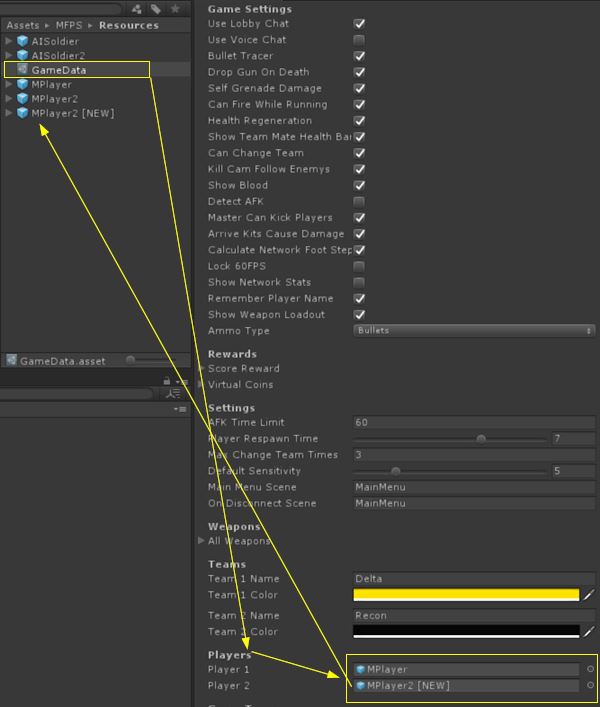
Now you need assign this new player prefab for use by one of the Teams (team 1 or team 2). To do this, go to GameData (in Resources folder too) -> Players section, and in the corresponding field (Team1 or Team2), drag the new player prefab.
Player Prefab - Step 6
That's it! You have your new player model integrated!.
Please note: Some models are not fully compatible with the default player animations re-targeting, causing some of your animations to look awkward. Unfortunately, there is nothing we can do to fix it automatically. To fix it you have two options: Edit the animation or replace with another that you know works in your model, check the documentation for more info of how replace animations.
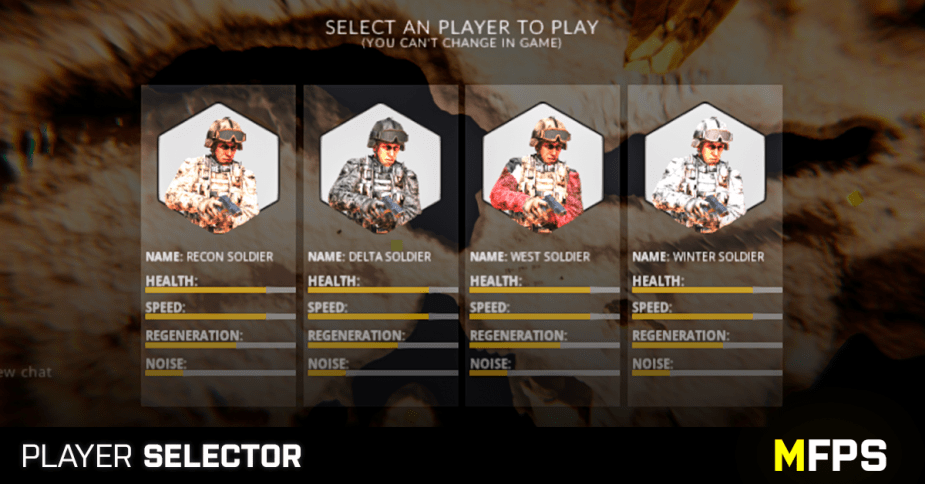
Do you want to have multiple player options so a player has more players to choose from?, Check out Player Selector Addon, with which you can add as many player models as you want:
Player Models Assets
Here you have a list of Asset Store player model assets that you can use to integrate in MFPS
Animation Assets
Here you have a list of Asset Store animation assets that you can use with your character models